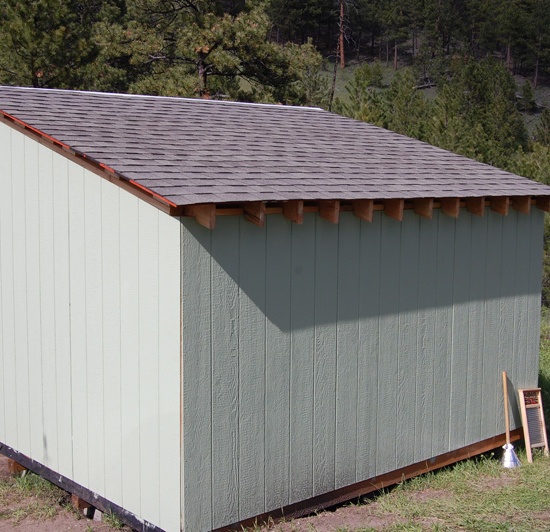
Here are the photos of our new shed we completed last week… from start to finish.


Neither of us have ever done a project like this before, so it was a good learning experience. We insulated the ceiling and walls (no photos of that). We added a tarp to the front for an outdoor cooking area, and moved our outdoor shower and latrine to the East side of the shed.
Building this was not without it’s challenges, but I’ll spare you the details. It’s functional, secure, water-tight, and completed. What more can you ask for?

Love the shed. What are the dimensions? I’d like to build one like it.
Hi Laurie, sorry for the delay in responding. The shed is 8′ x 12′. The slant is 8′ to 6′ in height.
How much did this cost to build?
Hi Dustin,
It cost us about $1200.00… but we totally overbuilt it, by adding insulation that doesn’t work when it’s -40 degrees, and we used 2×6 for the floor and rafter beams every 12″ OC… and the siding… and we were greenhorns who never built anything before…
Thank you for letting me know! I think it’s a great shed and I am going to try to make one myself! I was just concerned about cost and building one vs. buying one. Really great pictures too:)
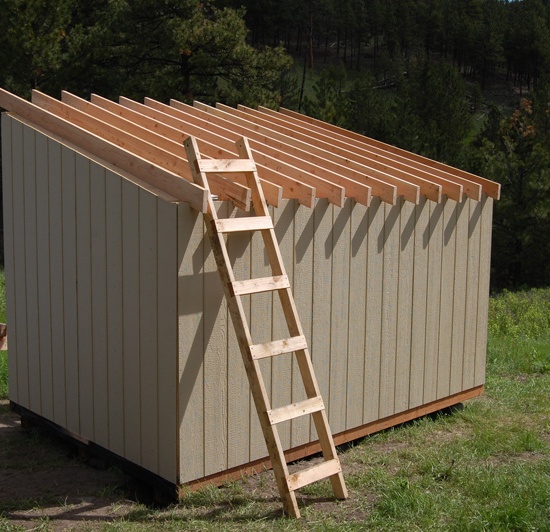
I have a question about your roofing studs, how did you anchor them to the rest of the wall frames? I see it looks like you notched them in? (Photo Shed016)
On the old shed, we notched them and toe-nailed them to the wall frame. On the new addition we just toe-nailed them. The new addition roof studs are 2×4 as opposed to 2×6 on the old section.
Thanks for visiting.
Love it. Did it take long to build?
I would like to make on 19 foot long 15 foot wide
Any info you have would be great.
Cheers
Ben
It took us about 3-4 weeks. But we never built anything before. I’m sure that a skilled craftsman would complete it sooner.
What angle or degree did u use to cut wall studs where it meets the top plate for sloping roof going from 8ft to 6ft?
Sorry Chuck. I don’t remember exactly. I think it was 6″ every foot from 8′ to 6′
ONE FRONT DOOR W/ TWO EXHAUSTS FANS FOR PIPE SMOKING TO BUY.
10×22
10×12
I plan on building one almost exactly that same design. I also plan on the same 8 X 12 size and same roof.
Would you happen to have a materials list?
txosu@prodigy.net